When Should You Repot a Monstera Plant and What is the Correct Way to Repot It?
Kim Marson
Gardening WriterKim is passionate about helping people create beautiful, healthy indoor spaces that are filled with plants. Kim believes that plants make us happier, healthier human...
- Outgrowing its current pot - when the roots start coming out of the bottom of the pot.
- Poor Drainage -soil remains waterlogged for extended periods after watering.
- Avoid disturbing the roots when repotting Monstera plants.
- Use a well-draining soil mix.
Repotting Monstera plants can seem daunting, but with the right care and attention, it can be a rewarding experience.
This article will show you how to re-pot your Monstera without traumatizing it. It we will be discussing the essential steps you need to follow to ensure a successful repotting of your Monstera plant. We will cover the importance of avoiding root disturbance, using a well-draining soil mix, providing adequate light and humidity, and avoiding over-watering.
Additionally, we will also give tips on how to give your plant time to adjust to its new pot and environment. Whether you're a seasoned plant parent or new to the game, this article has everything you need to know about repotting Monstera plants.
Signs That it is Time to Re-Pot Your Monstera Plant
Re-potting is crucial in caring for a Monstera plant, as it provides the roots with the space and environment they need to grow and absorb nutrients. There are several key signs to look out for when deciding whether or not it's time to re-pot your plant.
Monstera plants like to be root bound however it can become too cramped if you see signs that include roots coming out of the bottom of the pot, stunted growth, overcrowding of roots, and excess water accumulation. By understanding these signs and addressing them through re-potting, you can ensure that your Monstera plant stays healthy and continues to thrive.
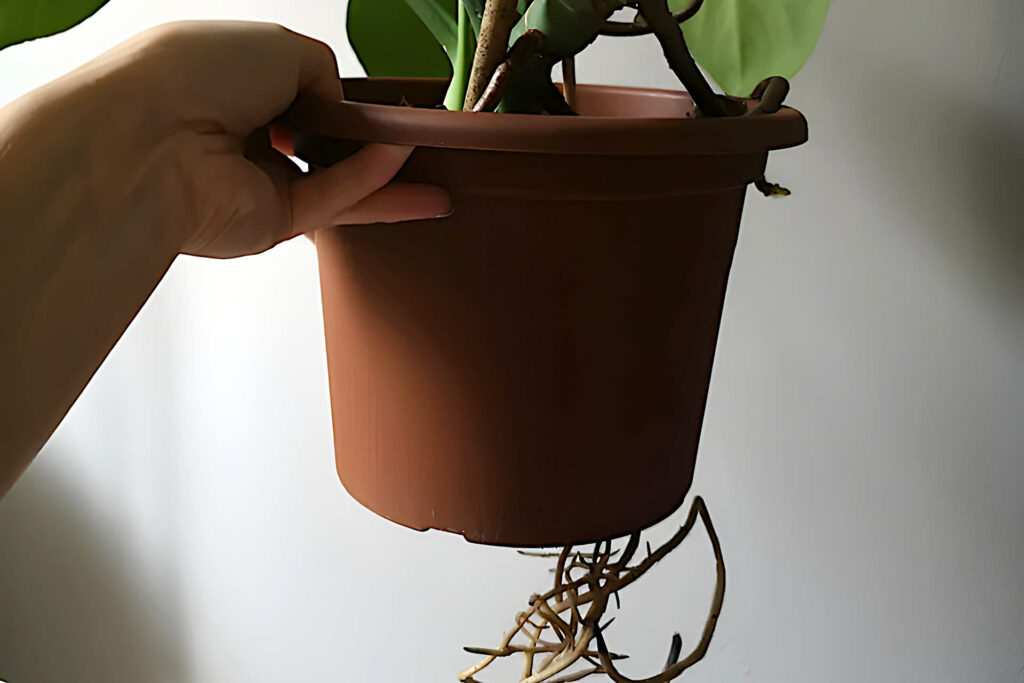
Roots Coming Out of the Bottom of the Pot
One of the most obvious signs that it's time to re-pot your Monstera plant is when you notice roots coming out of the bottom of the pot. This indicates that the plant has outgrown its current container and needs more room to grow.
Stunted Growth
Another sign to look out for is when the growth of your Monstera plant begins to slow down or become stunted. This can be due to a lack of nutrients or space for the roots to grow, both of which can be resolved by re-potting the plant.
Overcrowding of Roots in the Pot
If you notice that the roots of your Monstera plant are overcrowded and tightly packed in its current pot, this can cause issues with the plant's ability to absorb water and nutrients. Re-potting the plant into a larger container can alleviate this problem.
Excess Water Accumulation in the Bottom of the Pot
Finally, if you notice that water is consistently pooling in the bottom of your Monstera plant's pot, this is another sign that it's time for a larger container. Overwatering can lead to root rot, which can be fatal for the plant, so addressing this issue promptly through re-potting is crucial.
By keeping an eye out for these signs, you can ensure that your Monstera plant continues to grow and thrive and that it has the proper environment to do so. Re-potting can be daunting, but with proper planning and care, you can help your plant flourish for years to come.
Steps to Re-potting Your Monstera Plant
Re-potting your Monstera plant may seem intimidating, but with the proper preparation and techniques, it can be a straightforward process. Here are the steps you'll need to take to ensure a successful re-potting experience.
Step 1 - Choosing the Right Container
The first step in re-potting your Monstera plant is selecting a suitable container. Choose a pot that is 2-3 inches larger than the current one, and make sure it has good drainage holes. Bear in mind the plant likes to be root-bound so be careful not to use too big a pot.
Step 2 - Preparing the Soil/Potting Mix
Next, prepare the soil/potting mix you'll use to fill the new pot. A well-draining potting mix that is rich in nutrients is ideal, and you can also add perlite or sand to improve drainage.
Step 3 - Removing the Plant from Its Current Pot
Gently remove the Monstera plant from its current pot, taking care not to damage the roots. Loosen any tangled roots and clean them with rubbing alcohol oy a hydrogen peroxide solution to sterilize them before planting the plant in its new pot.
Step 3 - Transfer the Monstera Plant to the New Pot
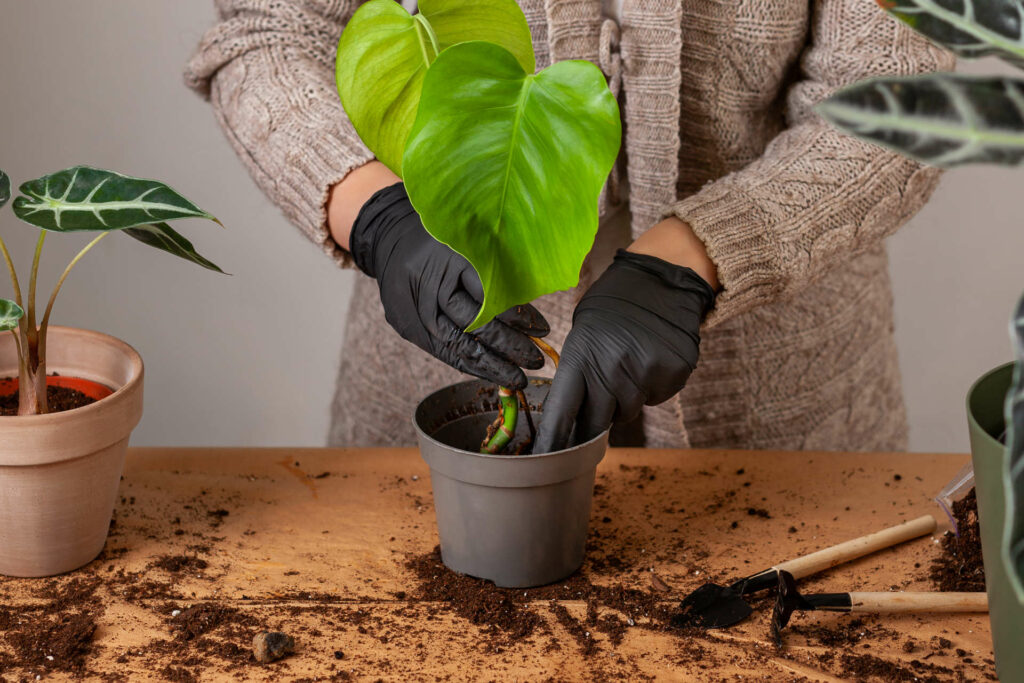
Next carefully place the Monstera plant ontop of the base layer of soil/potting mix in the new pot. Be careful not to damage the roots in the process.
Step 4 - Filling the New Pot with Soil

Filling the New Pot with Soil: Fill the new pot with the prepared soil, leaving room at the top for watering. Place the plant in the pot, ensuring it's sitting at the same depth it was in its previous pot.
Step5 - Watering the Plant

Water the plant thoroughly after re-potting, ensuring the soil is evenly moist. Avoid overwatering, as this can lead to root rot.
By following these steps, you can successfully re-pot your Monstera plant and give it the room and resources it needs to grow and thrive. Regular re-potting is an important aspect of Monstera care, so don't hesitate to give your plant the attention it needs.
Choosing the Right Pot Material for Your Monstera Plant
The material of the pot you choose for your Monstera plant can significantly impact its growth and health. Different materials offer different benefits and drawbacks in terms of watering, humidity, and aeration, so it's important to choose the right one for your plant's needs. Here's a closer look at some of the most common pot materials and how they can impact your Monstera plant.
Terracotta
Terracotta is a porous material that allows for good aeration and evaporation, helping to regulate the soil moisture. However, terracotta can also dry out faster than other materials, so it may require more frequent watering.
Ceramic
Ceramic pots offer a similar level of aeration to terracotta but are less porous and therefore retain moisture longer. This can be good for plants that prefer more consistent moisture levels, but may lead to overwatering if not monitored closely.
Plastic
Plastic pots are non-porous and retain moisture well, making them a good choice for plants that prefer consistent moisture levels. However, plastic pots can also lead to root rot if not well-drained, so it's important to ensure they have good drainage holes.
Other Materials
Other materials, such as concrete, wood, or metal, can also be used as pot materials, but may not offer the same level of aeration and evaporation as terracotta or ceramic. Be sure to research each material's benefits and drawbacks before deciding.
In choosing the right pot material for your Monstera plant, it's important to consider its specific needs and preferences. Consider the level of humidity and moisture it prefers, as well as the level of aeration and evaporation it requires, to make the best choice for your plant. With the right pot material, you can help your Monstera grow and thrive for years to come.
Tips for Repotting Monstera Plants:

Avoid Disturbing the Roots
When repotting a Monstera plant, handling the roots as gently as possible is important to avoid damaging them. Try not to disturb the root ball too much and avoid breaking or cutting the roots.
Use a Well-Draining Soil Mix
Make sure to use a well-draining soil mix when repotting your Monstera plant. This will help prevent water from sitting in the soil for too long and causing root rot. A mix of potting soil, perlite, and orchid bark is a good choice for Monstera plants.
Provide Adequate Light and Humidity
Monstera plants need bright, indirect light and high humidity to thrive. After repotting, place your plant in a spot that provides these conditions and keep the soil moist but not waterlogged.
Avoid Over-Watering
Over-watering can be a major issue for Monstera plants. Make sure to allow the soil to dry out slightly between waterings, and always use a pot with drainage holes to prevent water from accumulating in the bottom of the pot.
Give the Plant Time to Adjust
After repotting, it is normal for a Monstera plant to undergo a period of adjustment. Give it time to settle into its new pot and environment and be patient while it acclimates. Avoid moving it to a new location or making any other changes for a few weeks after repotting.
Kim is passionate about helping people create beautiful, healthy indoor spaces that are filled with plants. Kim believes that plants make us happier, healthier human beings, and she loves sharing her knowledge with others so they can experience the joys of plant care for themselves. <a href="https://plantcaresimplified.com/kim-marson/">Read more</a>
More Posts