How to Use LECA – Partially Submerged Nutrient Stagnant Method
Kim Marson
Gardening WriterKim is passionate about helping people create beautiful, healthy indoor spaces that are filled with plants. Kim believes that plants make us happier, healthier human...
What is the partially submerged nutrient stagnant method?
The partially submerged nutrient stagnant method (partially submerged method for short) is a passive hydroponic (semi-hydroponic) growing system in which plants are grown in water and nutrients.
In contrast to full hydroponic systems, which require nutrient circulation to facilitate plant growth, semi-hydroponic methods involve immobile or stagnant nutrient solutions.
In other words, there is no pump or timer to move the water around the system; instead, passive hydroponics relies on the capillary action induced by the plant's roots to draw up the solution and get nutrients and water to plants.
Capillary action is usually part of the passive sub-irrigation process that is employed with bottom-fed systems like the nutrient wick method. Although water/nutrients are added from the top with the nutrient stagnant method, it still leverages capillary action.
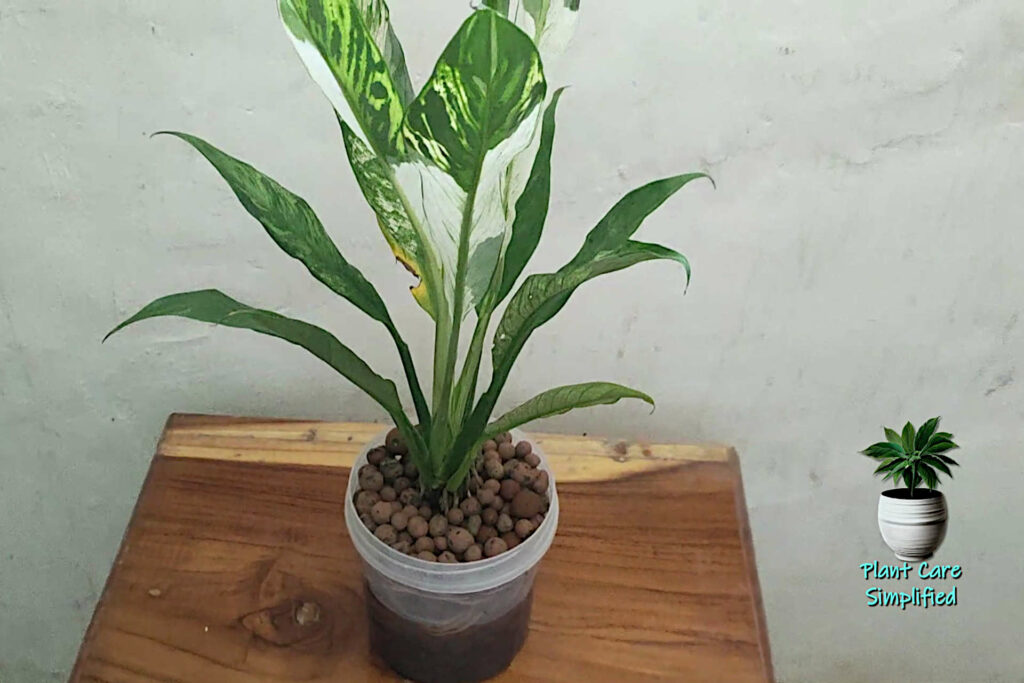
The partially submerged method is the most common method of growing plants using LECA as a stand-alone growing medium. The system provides easy access to the root zone and is aesthetically pleasing.
It also tends to be more forgiving than other systems because it doesn't require nearly as much maintenance or attention once they are up and running!
Step-By-Step Guide to Using the Partially Submerged Method with LECA
Step 1: Select the size of LECA balls you want to use. The most common sizes used range from between 0.3″ to 0.6″ (approximately 8-16mm).
Step 2: Ensure adequate preparation of the Clay balls, which involves washing, sometimes boiling, and soaking. The preparation process will remove any impurities, dust, and loose particles from the LECA balls.
Step 3: Assemble the necessary equipment:
- A new pot,
- pre-prepared clay aggregate
- soft brush,
- a sterilizing solution, 25% diluted hydrogen peroxide ( or rubbing alcohol),
- and clippers.
Step 4: Prepare the nutrient solution and
Step 4: Remove the plant from its existing medium and carefully clean the roots removing all dirt. Use the soft brush to remove all the old potting mix and then sterilize the root with the diluted hydrogen peroxide.
Step 5: Check plant roots for root rot or dead roots. Sterilize the clippers with the diluted hydrogen peroxide solution and then prune accordingly.
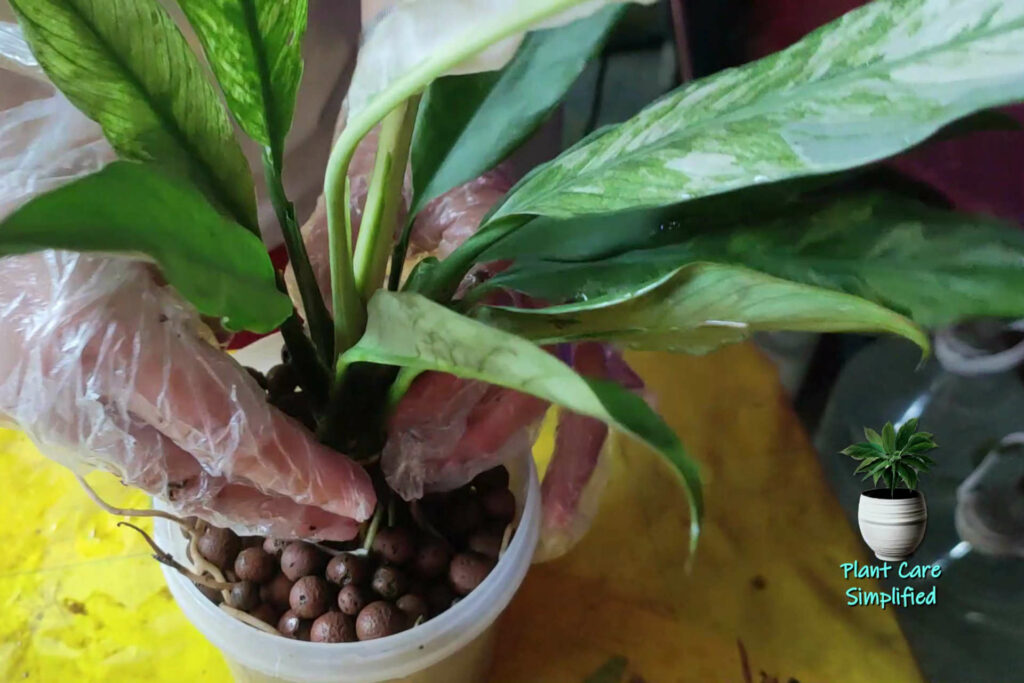
Step 6: Fill the new pot with LECA until the point where the base of the plant will coincide with the rim when you position the root ball.
Step 7: Gently place your plant's root ball on top of this initial layer of LECA, making sure not to damage the root ball.
Step 8: When in place, hold the plant while carefully filling in the remaining space around the roots until you reach just above the base of the plant, which should coincide with the lip of the pot.
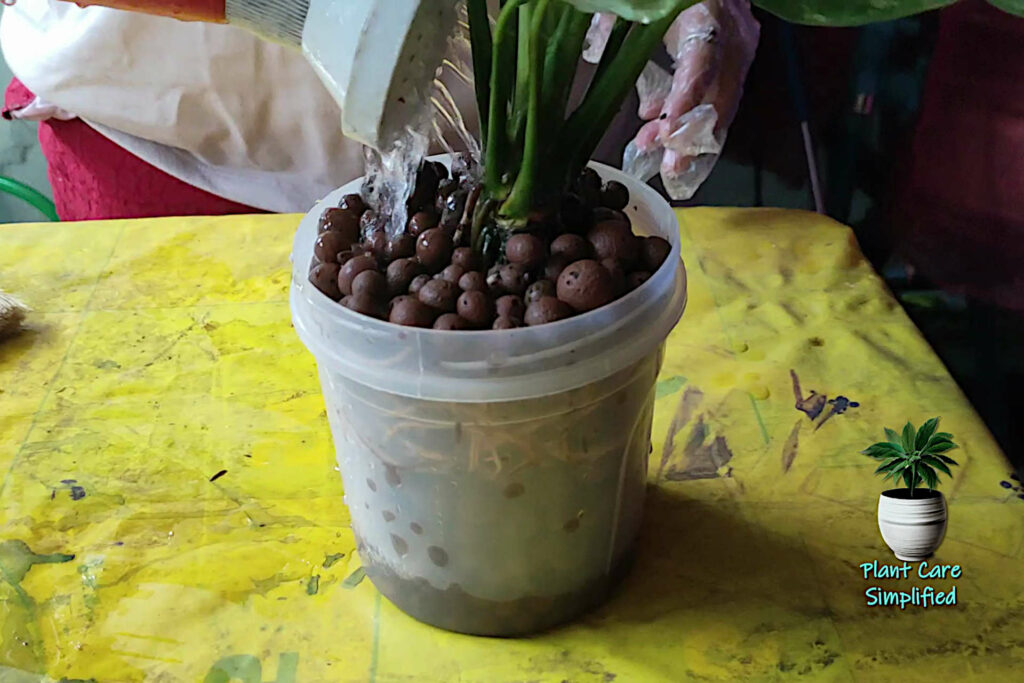
Step 9: Add a solution of water and nutrients; the specific nutrients will depend on your plant type. Fill until the solution reaches just beyond the bottom of the roots.
Managing your Plant
Managing plants grown in LECA is straightforward. Indeed, if you use a clear container or pot, you get an excellent visual of the amount of water or nutrient solution your plant is taking on board. The amount will vary depending on size, plant type, and the amount of light the plant processes.
As the expanded clay aggregate provides no natural nutrients, the plant obtains the nutrients from the solution. It is essential to ensure there are ensure adequate solutes in the solution. To do this, use a simple probe that monitors the parts per million (PPM) and the solution's electrical conductivity (EC) values.
For easier use of the probe, it is helpful to have a pot or container with a wider rim than the base, so it narrows toward the bottom, giving it a V-type shape.
The amounts of nutrients needed vary depending on plant type, some requiring very little in the way of nutrients, others requiring more monitoring.
Watering
As you watch the plant absorb the water over a few days, you can see when the level requires topping up. You should keep the level in contact with the bottom of the root ball. A full walkthrough of the watering process can be found here.
Aeration
As well as watering it is essential that you keep the water aerated so that the roots have enough oxygen (see below). Topping up the levels might not be enough to ensure enough oxygen is present in the solution, and you should change the solution every 10-14 days or aerate it by other means.
Problems that Might Occur
There are several problems that can arise when using the partially submerged method. These include failure of the capillary action and root rot from lack of oxygen.
Capillary Action is Failing
Occasionally, you might find a plant struggling with transitioning to its new growing medium. Problems often stem from the capillary action that the roots use to draw moisture up, which needs to be fixed. The main reason is that the nutrient solution level needs to be higher.
Transparent pots are helpful as they allow you to easily see the solution level compared to the root position. Gravity prevents capillary action from working if the roots are too far from the solution.
Lack of Oxygen in the Water or Plant Nutrient Solution
With any passive hydroponic system, it is crucial that the water/plant nutrient solution is properly aerated and contains enough oxygen. As the plant root absorbs nutrients and moisture from the solution used with the LECA, it also draws out oxygen. Unless this oxygen is replaced, the roots will be starved of it and start to rot.
Just topping up the water may not provide enough oxygen, and you must have additional ways of aerating the water/solution. There are two main ways in which you can add oxygen.
- The simplest is to change out the solution every 10 days or so. Just drain off the old solution and add fresh water/solution.
- The second method is to buy a small pump and pump air into the water or solution in the container/flowerpot.
The Shower Method
The shower method is a hydroponics technique that provides plants with nutrient-rich water by spraying it directly onto the roots. This method involves using a showerhead or sprinkler system to deliver the water and grow the plants in a soil-free medium like coconut coir, LECA, or vermiculite.
The shower method is suitable for watering many plants, including vegetables, herbs, and flowers.
Plants are placed in a flowerpot/container or tray with drain holes and filled with soil-less medium to use the shower method. The container is then positioned under the showerhead or sprinkler system, and the water is sprayed evenly over the entire root system of the plants. It is essential to water the plants regularly to ensure they receive sufficient nutrients and moisture.
One application for the shower method is to help plants recover from overwatering and root rot. This water/nutrient delivery method means that the roots do not sit in water or nutrient solution. The downside of the technique is that you will need to water the plant multiple times a day, and it is best if you have an automated delivery system.
Kim is passionate about helping people create beautiful, healthy indoor spaces that are filled with plants. Kim believes that plants make us happier, healthier human beings, and she loves sharing her knowledge with others so they can experience the joys of plant care for themselves. <a href="https://plantcaresimplified.com/kim-marson/">Read more</a>
More Posts